


Building a garden fence is a DIY project that can transform your garden, offering privacy, security and a beautiful backdrop for your outdoor living. Among the various options available, feather edge fencing remains a favourite for its consistent look and exceptional durability. But one question still remains: how much overlap should you use when fitting feather edge boards?
Get it right, and you’ll have a strong, private, weather-resistant fence for decades to come. Get it wrong, and you risk a weaker structure with gaps that will shorten its lifespan.
In this guide, we’ll walk you through the perfect overlap for your feather edge boards, discuss the nail vs. screws debate and share pro tips to ensure your fencing project is a success.
Why Overlap Matters in Feather Edge Fencing
Feather edge boards are tapered, meaning one edge is thicker than the other. They should be installed with the thick edge overlapping the thin edge of the adjacent board. This system isn’t just for aesthetics, but is designed for performance.
A correct overlap delivers three key benefits:
- Strength – Overlapped boards share the load, so individual boards are less likely to loosen or crack in strong gusts.
- Privacy & Weather Resistance – The correct overlap prevents gaps from forming as the wood expands and contracts, ensuring you get the privacy you intended when building the fence.The overlap works like roof shingles—rain runs down the face of a board and over the next one, instead of into a vertical seam. Less water getting behind the boards means slower rot.
How Much to Overlap 125mm Feather Edge Boards?
The golden rule for how much to overlap a 125mm (5 inch) wide feather edge board is to aim for a consistent 25mm (or 1 inch) of cover.
This measurement is the sweet spot that provides ample coverage without being wasteful. Overlap too little, and you risk gaps appearing as the wood expands and contracts. Overlap too much and you’ll use more boards than necessary, increasing the cost and weight of the fence without adding any structural benefit.
Pro Tip – The easiest way to ensure a perfectly consistent overlap is to use a spacer. A simple 100mm off-cut of wood placed over the previous board will act as a foolproof guide, giving you a clean, 25mm professional overlap every time.
How Much Overlap on 150mm Feather Edge Boards?
For the less common 150mm (6-inch) wide feather edge board, a 30mm overlap is ideal. After the overlap, each board will contribute a net width of around 120mm to your fence. Wider boards are excellent for creating a robust, high-privacy fence with fewer individual boards, making the installation process quicker.
The Most Important Rule When Fitting Featheredge Boards
When you nail (or screw) your feather edge board, make sure that you nail slightly past the 25mm overlap, missing the board behind. This process will allow your boards to expand and contract without splitting.
Should You Use Nails or Screws for Fixing Feather Edge Boards?
Either option is acceptable. Nailing is much quicker and more economical; however, using screws can have a few benefits:
- Superior Holding Power – They provide a stronger, more reliable hold against wind pressure.
- Easier Repairs – If a single board gets damaged, it’s much easier to unscrew it and replace it without disturbing the neighbouring boards.
- Reduced Splitting – When you pre-drill a pilot hole (which is highly recommended when using screws on timber), you reduce the risk of splitting the thin feather edge.
If you choose screws, always opt for weather-resistant types. We recommend galvanised or stainless steel screws to prevent unsightly rust stains and ensure the longevity of your fixings. You can find a selection of the right fixings on our fencing accessories product page.
Step-by-Step Installation Guide
- Solid Foundations – Ensure your fence posts are secure, spaced at 3.0m apart and pressure treated for ground contact.
- Fix Your Arris Rails – Attach your horizontal cant rails to the posts. A three-rail system is standard for 1.8m and 2.0m high fences.
- Fix Your Gravelboard – Attach your 3.0m x 150mm timber gravelboard to the bottom of your posts. As well as providing extra strength and durability this provides a base for your boards to sit on, ensuring a perfectly straight top to your fence. Using a graveboard can also provide the extra height needed to achieve a 2.0m-high fence.
- If You Didn’t Fit a Gravelboard – Set A String Line – Run a string line along the top of the posts,. This will act as a guide to keep the top of your boarding perfectly straight.
- Start Fixing – Begin at your first post. Place your first board with the thick (butt) edge against the post. Use your spacer, then place the next board so its thick edge overlaps the first by 25mm.
- Work Your Way Across – Continue this process, using your spacer for each new board and checking for vertical alignment with a spirit level every few boards.
Common Mistakes to Avoid
Inconsistent Overlap – This is the number one aesthetic and functional error. It creates weak points and looks unprofessional. Make sure you use a spacer.
Skipping Treatment – If you’re using untreated timber, always apply a wood preservative to the cut ends and the entire board before installation. This is a critical step for durability.
Shop Feather Edge Boards and Accessories
Ready to start your fencing project? At Grangewood Fencing, we supply premium, pressure-treated feather edge boards that are perfect for creating a strong, long-lasting fence. Our timber is sourced for quality and treated to resist rot and decay, giving you peace of mind for years to come.
Autumn Garden Projects
As the days get colder and the nights draw in, the time comes to savour those days where we actually get a bit of sunshine. These days present the perfect opportunity to get your Autumn garden projects underway. To give you a little inspiration, we’ve come up with our top 5 products to help you spruce up your garden this November.
Decking
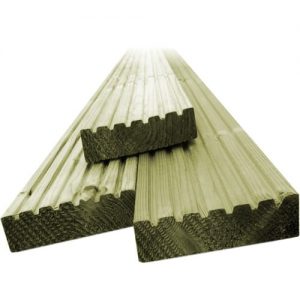
To begin with we have decking! Our timber decking boards make for both an attractive and practical outdoor surface which will last for years to come. Our pressure treated decking boards are more resistant to rotting and warping, so other than the occasional Ronseal coating to maintain your colour of choice, your deck will need very little TLC.
If you’re looking for an alternative to your traditional timber decking, we also stock HD composite decking. This is a low maintenance and durable alternative to timber. Although it looks like wood, it uses the latest in composite technology to create a long-lasting decking. This decking maintains consistent colour and has slip resistant properties. It’s perfect for you Autumn garden projects and we even have our own handy guide on how to install it, making your life that little bit easier.
Hazel Hurdles
Another great product we have right now are our hazel hurdles and we can’t talk about them enough! They’re currently on offer too, which makes them an even more attractive pick for this month’s top 5. If you’re not a fan of the traditional decorative fencing look, hazel hurdles are a high-quality rustic style fence for those who prefer something a little more natural looking with the same amount of style and luxury. Due to their construction, the panels look the same from both sides. This makes them excellent for boundary fencing between neighbours. Lots of people use our shorter hazel hurdles (heights range from 0.9m to 1.8m) as borders within their own gardens. This can be seen in the photo below, and it looks great!
Our hazel hurdles also hold the FSC logo which identifies products which contains wood from well-managed forests. This way you know you’re getting an ethical product, as well as a beautiful fence.

Featheredge Board
Featheredge boards are one of our favourite fencing products! These boards are 125mm x 22m and are ideal for creating a sturdy boundary fence that will stand up to heavy winds, whilst still looking attractive. The boards are extremely durable. Often we see bad weather at this time of year, so they’re great for repairing existing fence panels that may have been damaged. They can even be affixed to closeboard panels so that both neighbours can have the same perfect finish – there’s no need for neighbourhood wars over fencing anymore! All of our featheredge boards are pressure-treated with TANATONE. This provides long term protection against fungal and insect attack. What’s not to love!?
4×4 Brown Timber Posts
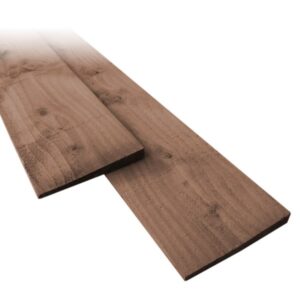
Arguably a staple regardless of the time of year, our pressure treated 4×4 brown timber posts are ideal for supporting most types of timber fence panels. Having pressure-treated posts not only enhances the look of the posts but protects the timber from insect infestation, fungal decay and rot too. The posts come in a variety of heights to suit any project. They’re perfect – what else can we say!? They’re simply a staple!

Rapid Set Fence Post Concrete
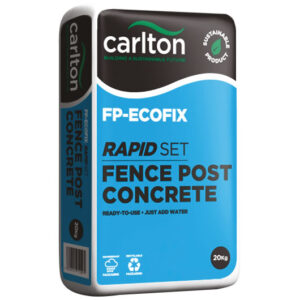
Last but not least, we have our rapid set fence post concrete. Some may not consider this the most exciting product, and whilst it isn’t our most beautiful it definitely is one of the most useful! Our rapid set fence post concrete is a mixture of dried sands, cement and other additives. It also sets in only 5 to 10 minutes! It’s quick and easy to use – perfect for Autumn garden projects when daylight is fleeting. Only one bag per post is required and no mixing is needed. All you need to do is add water. The concrete is in polythene packaging so it’s suitable for outdoor storage. Even if the weather takes a turn (like it often does this month), the plastic bags are showerproof so there’s no need to worry. Simply put – the rapid set concrete is a product that makes your project easy and simpler!
So that wraps up our top 5 products for this month! We have plenty to show off so be sure to check back next month for December’s top products.
FENCEMATE DuraPost – A Revolutionary New Fencing System
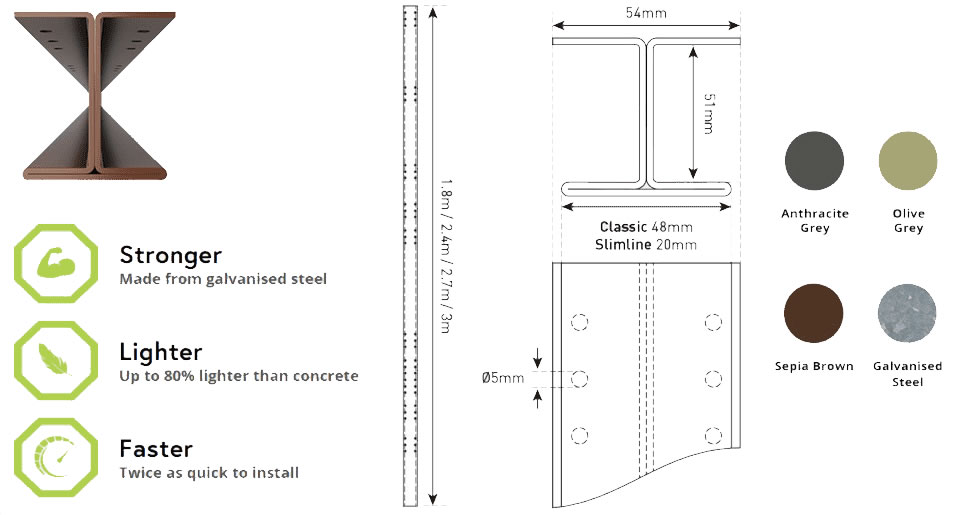
Made of galvanised steel, the FENCEMATE DuraPost System creates durable fencing that is quick to install. DuraPost is suitable for all the jobs where you might have used concrete or timber posts. The system is compatible with virtually all types of timber fencing panels including feather board, hit and miss, European panels and close boarded fencing.
What types of jobs is FENCEMATE DuraPost suitable for?
DuraPost is suitable for all the jobs where you might have used concrete or timber posts.
Why does DuraPost come with a continuous run of holes?
The continuous run of holes provided on the DuraPost allows you to fix your fence panel or gravel board from the rear of the post. The holes make it easier to construct your fence, particularly when building on a slope.
Which types of fencing is DuraPost suitable for?
DuraPost is suitable for virtually all types of timber fencing panels including feather board, hit and miss, European panels and close boarded fencing. The post can be used for post and rail fencing but is not designed for any type of wire fencing systems.
Is DuraPost really up to twice as quick as concrete to install?
A test was carried out using independent professional contractors. This demonstrated that the time taken to fit fence panels with DuraPost took only half the time in terms of man-hours when compared to concrete posts. One person was able to carry out the tasks normally requiring two people because DuraPost is so much lighter and easier to use than concrete posts.
Does FENCEMATE DuraPost really withstand high winds?
Yes. The product underwent independent testing at the Building Research Establishment and proved to withstand wind speeds in excess of 70MPH.
How sustainable is FENCEMATE DuraPost?
DuraPost is made from steel which is a sustainable material and can be infinitely recycled.
FENCEMATE DuraPost – Technical Specifications
FENCEMATE DuraPost – Installation Instructions
Step 1:
Set your first post into the ground using Rapid Set Fence Post Concrete and check the height. Dig the next hole. You can now position the gravelboard at the correct height and checked for level.
Step 2:
Slide your fence panel into the first post and secure with screws. Position your second post, check for alignment and set into the ground.
Step 3:
Fix capping rail and post caps if required.

You can find the full range of FENCEMATE Durapost products on our website.